A solar cable can look intact while a loose connector, crushed sheath, failed seal, or moisture path creates a serious fault. By following a documented inspection sequence, you can separate dirt from damage, identify the failed component, choose the correct test, and decide whether cleaning, repair, monitoring, or solar cable replacement is justified.
Key takeaways
- Record cable markings, voltage class, temperature rating and drum number.
- Isolate the circuit before inspecting or testing solar cables.
- Replace damaged cable with matching ratings, not a visually similar type.
- Check connector seals, glands and terminations for heat and moisture damage.
Start with identification, isolation, and a complete route record
Before looking for damage, confirm exactly what is installed. Record the conductor cross-section, DC voltage class, temperature rating, installation date, batch or drum number, and every marking printed on the sheath. A visually similar cable is not an acceptable substitute unless its electrical and environmental ratings match the design.
- Identify each string and cable route from array to inverter, including junction boxes, clips, glands, connectors, and joints. Mark the defect location by distance or reference point, then photograph it.
- Isolate the circuit at the inverter, combiner box, and other connected sources. Apply lockout and tagout, disconnect the relevant PV string, and verify absence of voltage with a suitable meter. A qualified electrician must perform live-system or high-voltage testing.
- Record the inspection conditions: date, weather, operating state, instrument identification, test voltage, measured values, repair made, and retest result. This prevents a cable replacement from leaving a faulty connector, water ingress, or routing defect in service.
- Before ordering, request the current datasheet, conformity or test documents, batch traceability, supplied length, and confirmed cross-section. Packaging and sheath markings prove more than an invoice description.
Use a cable dealers polycab solar cable for condition checks only when its voltage, temperature, UV, ozone, weather, flexibility, and conductor ratings match the original design. Do not replace photovoltaic cable with ordinary PVC building wire.
Inspect the sheath, routing, environment, and contamination
Polycab solar cable maintenance starts with the sheath and its route, not just an insulation-resistance reading. Follow every string from module to inverter and look for damage caused by sunlight, heat, water, movement, rodents, roof edges, or metalwork.
- Clean surface dirt, bird droppings, mud, and salt deposits when the sheath remains smooth, intact, and flexible.
- Monitor chalking, fading, minor scuffing, loose clips, unsupported spans, and wind-driven movement. Re-secure the route before abrasion becomes a cut.
- Repair routing when the cable lies in standing water, touches a sharp edge, is tightly kinked, hangs from a connector, or is crushed by an over-tight fastener.
- Stop using the cable for exposed conductor, longitudinal cuts, deep abrasion, cracks, embrittlement, swelling, rodent bites, flattened sections, or heat-discoloured insulation. Ordinary electrical tape does not restore UV resistance, moisture sealing, double insulation, or voltage performance.
| Condition | Decision | Action |
|---|---|---|
| Surface dirt only | Cleaning issue | Isolate as required, clean with a compatible method, dry, and recheck |
| Loose support or rubbing | Repair and monitor | Re-route, add suitable clips, remove sharp contact, photograph the correction |
| Chalking, minor abrasion, or repeated wind movement | Monitor closely | Record the location, inspect at a defined interval, and compare photographs |
| Cracked, cut, brittle, swollen, melted, or exposed sheath | Replacement issue | Replace the complete damaged section and investigate the cause |
| Waterlogged route or staining near a joint | Repair and test | Remove the water-entry path; do not treat the cable alone as the fault until the joint is checked |
Check MC4-compatible connectors, glands, and terminations separately
A hot connector does not prove a cable defect. Use thermal imaging under meaningful load to locate abnormal heating, then de-energise the circuit before opening the connection.
Use these findings to localise the fault:
- Cracking, cuts, flattened sections, exposed conductor, or failed insulation readings along the route point to the cable.
- Discolouration, melted MC4-compatible housing, arcing marks, incomplete mating, or mismatched connector brands point to the connector pair.
- A hardened, displaced, or wet seal, water inside the gland, or a gland that grips the sheath unevenly points to the gland or enclosure entry.
- A loose crimp, visible strands, corrosion, incorrect torque, or a contact that pulls out points to the termination.
- Heat concentrated at a junction box, branch joint, or splice points to a high-resistance joint rather than the cable run.
Inspect contact engagement, crimp compression, seal position, strand damage, and torque with the circuit isolated. Do not rely on a connector’s outer appearance; a sound-looking joint can still arc under load.
For a cable dealers Polycab condition check, record each finding against the sheath marking, cable end, connector, gland, and junction location. Replace or reterminate the failed component only after confirming compatibility. A larger conductor will not fix a termination whose contact or crimp barrel is undersized.
Have a qualified electrician perform isolation, live-system inspection, and any high-voltage testing.
Use electrical tests to decide whether the circuit is safe to retain
Retain an installed solar cable only when polarity, continuity, insulation resistance, and earth-fault checks meet the system’s acceptance limits. A qualified electrician must perform live-system and high-voltage testing; isolate the array before continuity or insulation tests, and disconnect sensitive equipment as the inverter and module manufacturers require.
- Confirm polarity at both ends and measure open-circuit voltage where the PV procedure permits it. Reversed polarity, zero voltage, or a voltage that differs materially from the paired string points to a connection or cable fault.
- Check continuity through each conductor. An open circuit, unstable reading, or unexpectedly high resistance indicates a broken conductor, damaged crimp, or failed joint.
- Perform insulation-resistance testing with a suitable DC test voltage specified by the module and inverter manufacturers and the applicable acceptance standard. Do not megohm-test connected electronics indiscriminately.
- Check for an earth fault and compare readings with earlier records. A declining insulation value warrants investigation before moisture or abrasion creates a trip or fire hazard.
| Check | Retain when | Choose solar cable replacement when |
|---|---|---|
| Polarity and voltage | Correct polarity and expected string voltage | Reversal, zero output, or unexplained imbalance remains after connector checks |
| Continuity | Stable, low-resistance conductor path | Open circuit or abnormal resistance persists |
| Insulation resistance | Reading meets the specified limit | Reading fails the limit or continues falling |
| Earth-fault check | No conductor-to-earth fault | Fault returns after isolating connectors and equipment |
For solar cable replacement, test again after installation and record the result with the route, cable marking, and date.
Replace the complete defect correctly and preserve traceability
Specify the replacement from the design record, not from appearance. Match the conductor cross-section, DC voltage class, temperature range, polarity identification, routing method, and connector arrangement. A larger cable is not automatically safer: it may not fit the existing contact or crimp barrel.
Use a Polycab solar cable dealer or cable dealers Polycab supply channel that can provide:
- The current product datasheet and applicable conformity or test documentation
- The supplied length, cross-section, drum number, and batch number
- Packaging and sheath-marking details that match the order
Record Prabhat Cables Pvt. Ltd as the supplier when it provides the replacement, alongside the drum or batch number. Check the sealed drum, printed sheath markings, and length before installation; an invoice description alone does not prove the cable rating.
Install the cable with the specified connector system, correct contact, crimp die, stripping length, seal, and assembly procedure. Do not mix connector brands because plugs that mate can still have incompatible contacts or seals. Secure the route without sharp bends, unsupported spans, or new abrasion points.
A qualified electrician must perform live-system and high-voltage testing. After installation, check continuity, polarity, earth-fault condition, and insulation resistance at the suitable DC test voltage, then compare results with the original record. Document the route, defect location, photographs, instruments, test voltage, readings, weather, repair, and retest result.
Remove the failed cable from service, label it as defective, and send it through the site’s electrical-waste or cable-recycling process. Do not leave cut lengths mixed with serviceable stock.
Related product
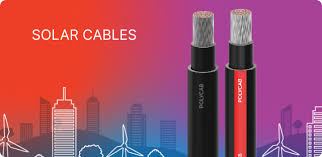 | Polycab Solar Cables Polycab solar cables are specifically designed for solar power systems, offering high-quality, reliable, and durable wiring solutions for efficient... View product → |
Frequently asked questions
What should you record before checking a solar cable?
Record the conductor cross-section, DC voltage class, temperature rating, installation date, batch or drum number and every sheath marking. Confirm these details against the system design before accepting a substitute.
What damage should you look for on solar cable routes?
Inspect the sheath for cuts, cracking, flattening, abrasion, swelling, discolouration and exposed conductor. Check routing near sharp edges, hot surfaces, standing water, rodents, chemicals and accumulated dirt.
How should MC4-compatible connectors and glands be checked?
Inspect connector bodies, locking features, seals, crimped contacts and cable glands separately. Look for looseness, scorching, corrosion, moisture entry and incorrect crimping; replace parts that no longer provide a secure, sealed termination.
When should you replace a solar cable instead of retaining it?
Replace the complete defective cable section when the insulation is damaged, electrical tests fail, the cable rating does not match the design or a reliable repair cannot restore the original protection. Record the replacement cable markings and batch details.