Solar cable selection is not just a choice of colour or metre price: every module connection, string run and inverter termination must match the system’s voltage, current, environment and connectors. By the end, you will be able to compare cable markings, calculate the important sizing factors, inspect rooftop suitability and request evidence that supports a purchase before installation begins.
Key takeaways
- Use solar cable from module leads through the DC circuit to the inverter.
- Match conductor size to current, voltage drop, route length and installation conditions.
- Check UV, temperature, water-resistance and mechanical markings before purchase.
- Confirm cable, connectors and terminations are compatible as one complete system.
Where solar cable is used across a photovoltaic system
Photovoltaic cable runs through the direct-current side of a solar installation, from the module leads to the inverter. Each location exposes the cable to sunlight, rain, heat and mechanical movement, so the correct cable protects electrical performance over years rather than only meeting its initial current requirement.
| Location | What the cable connects | Practical benefit of suitable photovoltaic cable |
|---|---|---|
| Module to module | Adjacent panels within a string | UV-, ozone- and moisture-resistant insulation withstands rooftop exposure and repeated heating and cooling without cracking. |
| String wiring | The completed string to its combiner box or DC distribution point | Flexible, correctly sized conductors limit voltage loss and remain reliable when routed along rails, clips or trays. |
| Combiner box connection | Multiple string positives and negatives entering the box | A durable DC-rated jacket and clear polarity marking reduce insulation damage and connection errors during maintenance. |
| Combiner box to inverter | The DC collection circuit to the inverter | The correct voltage class and conductor cross-section handle sustained DC current while limiting heat and voltage drop. |
The practical polycab solar cable benefits matter because ordinary PVC house wire can age faster under direct sun, ozone and monsoon wetting. Use photovoltaic cable marked for the system’s DC voltage, such as H1Z2Z2-K under EN 50618 or IEC 62930; do not use it on the inverter’s AC output, which requires suitable AC cable.
Correct cable still fails if contacts are under-crimped, incompletely inserted or joined with solder-only field joints.
How markings and conductor size affect the cable choice
A suitable cable must exceed the array’s maximum DC voltage and carry its design current after derating. Read the jacket and datasheet together: H1Z2Z2-K, EN 50618 or IEC 62930, the voltage class, conductor cross-section, UV and ozone resistance, and polarity marking provide evidence that it is photovoltaic cable rather than ordinary PVC house wire.
| Marking or figure | What it tells you | Choice check |
|---|---|---|
| H1Z2Z2-K | Photovoltaic cable designation | Confirm the datasheet identifies the same construction |
| EN 50618 or IEC 62930 | Applicable PV-cable standard | Reject a product described only as “solar wire” |
| 1.5 kV DC | Maximum system voltage class | Select a rating above the calculated array voltage |
| 4 mm² or 6 mm² | Nominal conductor area | Compare with ampacity, voltage drop and resistance |
| Ω/km and conductor material | Electrical loss and construction | Use the stated resistance, not an assumed copper value |
Use the manufacturer’s ampacity table after accounting for:
- Ambient temperature, roof heat and grouped cables
- Conduit, tray or free-air installation
- String current and the allowable voltage drop
- Positive and negative cable length, using Vdrop = 2 × length × current × resistance
- The datasheet’s maximum conductor resistance
A larger cross-section reduces voltage loss but increases cost, bending effort and termination size. The practical polycab solar cable benefits—sunlight, ozone, moisture and thermal-cycle resistance—matter only when the selected marking, conductor and installation rating match the system.
How to assess rooftop exposure in Bhubaneswar
Do not approve a cable because it says “solar” on the package. For a Polycab solar cable in Bhubaneswar, judge the complete route, the exposure and the supporting hardware.
1. Check the datasheet for IEC 62930 or EN 50618 compliance, UV and ozone resistance, weather-resistant insulation, and the system voltage, commonly 1.5 kV DC. These details show that the cable is designed for photovoltaic service rather than indoor PVC wiring.
2. Inspect the roof route at midday. Mark sections exposed to direct sunlight, areas close to hot roofing sheets, and places where cables lie in bundles or conduit. Use the manufacturer’s ampacity table after accounting for ambient heat, grouping, conduit, tray installation and restricted airflow; a catalogue headline rating can overstate usable current.
3. Trace every low point and cable entry before installation. Monsoon water can collect in sagging loops, unsealed glands and conduit ends, accelerating insulation damage and causing faults at connectors.
4. Examine the site for salt-laden coastal air or industrial contamination. Confirm connector seals and glands are suitable for outdoor exposure, keep water-trapping points out of the design, and select corrosion-resistant mounting hardware; UV resistance alone cannot protect a corroding connection.
5. Compare the planned string and home-run lengths with the cable’s bend radius and fixing method. Secure the cable away from sharp metal edges and standing water, without crushing it or leaving unsupported loops.
How cable, connectors and terminations must work together
Match the connector to the cable, not merely to the module socket. MC4-type connectors from different manufacturers can look identical while using different contact dimensions; mixing them can reduce contact pressure, increase resistance and create heat or arcing.
Confirm these matches before installation:
- Cable conductor cross-section and insulation diameter match the connector’s approved crimp contact and sealing insert.
- The contact matches the manufacturer’s specified crimping tool, die and crimp profile.
- Male and female connector halves come from the same compatible connector system.
- The gland seal matches the cable’s outer diameter and provides the required IP protection.
- Conduit internal diameter allows the cable to pass without crushing, sharp bending or trapped water.
- The inverter terminal accepts the conductor size, ferrule or lug specified by its installation manual.
Strip to the stated length and insert each contact fully until its locking feature engages. Solder-only joints, under-crimping and partially inserted contacts create intermittent faults and hot spots; retain crimp-tool settings and pull-test records on larger projects.
Size each run for its installation, not a catalogue headline. Bundling, conduit, roof heat and limited airflow reduce ampacity, while long inverter home-runs increase voltage drop.
A solar cable supplier in Bhubaneswar should quote separate module, string and home-run lengths, polarity colours, spare allowance and termination arrangements, then coordinate them with fuse, connector and inverter ratings.
What to verify before buying from a cable dealer
A quotation is not enough to approve dispatch. Ask the polycab cable dealer for documents and physical details that identify the exact cable, because “solar wire” on an invoice cannot support a warranty claim or expose a downgraded conductor.
1. Match the product code, conductor cross-section, insulation designation and colour with your design. The datasheet must state IEC 62930 or EN 50618, plus the required DC voltage class, commonly 1.5 kV DC.
2. Request the manufacturer’s ampacity table. Check its rating against ambient temperature, roof proximity, conduit or tray installation, cable grouping and free-air conditions; a catalogue headline rating may not apply to your route.
3. Confirm every cut length before packing: module links, string runs, combiner-box connections, inverter home-runs and spare allowance. Buying only total metres creates avoidable joints, extensions and polarity errors.
4. Inspect sealed manufacturer packaging, printed markings and batch identification. Ask for the matching datasheet, test documentation and tax invoice; Prabhat Cables Pvt. Ltd can use those records to tie supplied cable to the ordered Polycab product.
5. Confirm the connector contact, crimp profile, stripping length and gland arrangement with the installer. Reject plans using solder-only joints, partially inserted contacts or under-crimped terminals, which can create hot spots.
A search for polycab cable dealer solar cable for benefits in bhubaneswar is only a starting point. Approve dispatch after the paperwork, batch details, lengths and termination plan agree with the installation drawings.
Related product
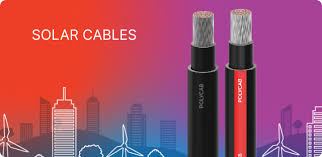 | Polycab Solar Cables Polycab solar cables are specifically designed for solar power systems, offering high-quality, reliable, and durable wiring solutions for efficient... View product → |
Frequently asked questions
Where is solar cable used in a photovoltaic system?
It carries DC power from module leads through string connections and junction points to the solar inverter.
Which solar cable markings should you check before buying?
Check the cable size, voltage rating, temperature range, insulation type, UV resistance and standard marking printed on the sheath.
How does Bhubaneswar rooftop exposure affect solar cable selection?
Account for strong sunlight, monsoon rain, humidity, rooftop heat, water collection points and movement caused by wind or maintenance.
Why must connectors and terminations match the solar cable?
A correct cable can still fail when connectors do not match its conductor size, contact design, voltage rating or sealing requirements.
What should you verify with a solar cable supplier in Bhubaneswar?
Ask for the exact cable specification, manufacturer details, batch identification, test documents, invoice and confirmation that the cable suits your connectors and inverter.